
Guide
Using the Digital Asset Manager (DAM)
Learn how to find images, documents, and other media by using our Digital Asset Manager
Updated on 11 June 2025
The DAM (Digital Asset Manager) is an easy way to store and search for digital assets.
If you're a member of University staff or a researcher, you'll be able to quickly find relevant images, videos, documents, and other media.
Log in to the DAM
- Go to the login page in your browser.
- Use the Go button underneath the text Log on using your UoD credentials and use your University account details to log in.
- Do not use the 'Non-UoD users' section as this is for users who do not have single sign on credentials
Approval process
If you are a member of University staff, access will be granted once an Administrator has checked your details.
Students are not currently eligible for access.
Categories and search
A number of tools are available in the system so that you can narrow down the number of assets being presented. You are likely to use the Categories, Search, and Filter tools the most.
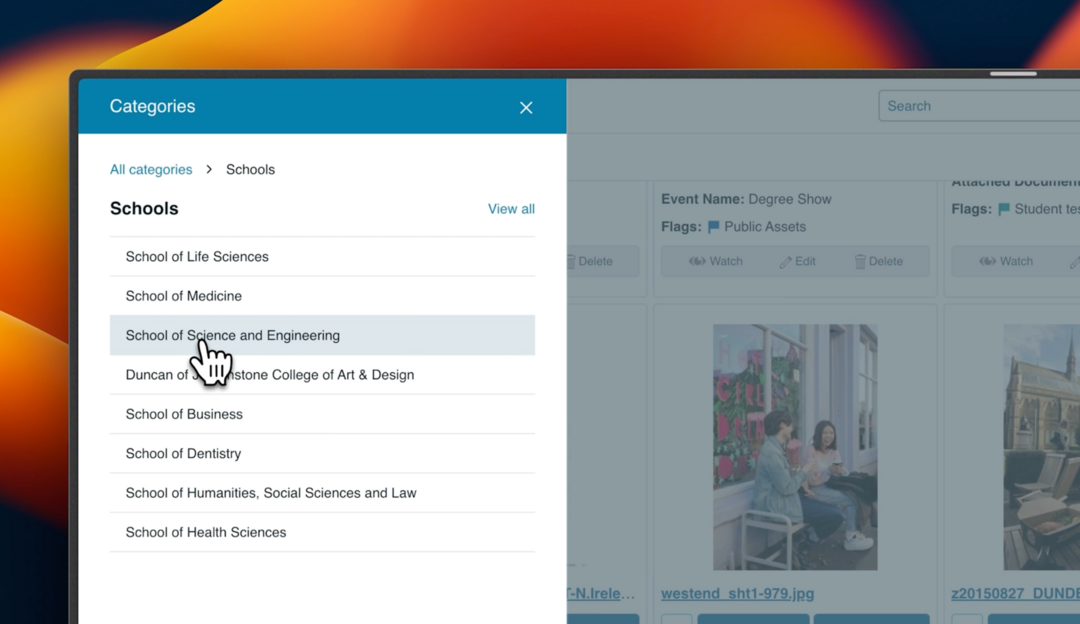
Categories
To access the Categories tool, click Categories at the top left of the dashboard, below the University of Dundee logo. A panel will slide out with a list of primary categories. Some of these categories will also have subcategories.
Search
The search bar is at the top-middle of the DAM.
- Use specific terms (e.g., "School of Science and Engineering") for more precise results.
- Use broader descriptions (e.g., "smiling students" or "photos with trees") to find related assets using AI image recognition and keywords.
The system will find and display the most relevant assets based on your search.
Search filters
When using Categories or Search, you can refine your results with filters. These are listed on the left side of the screen and show the number of assets available for each filter.
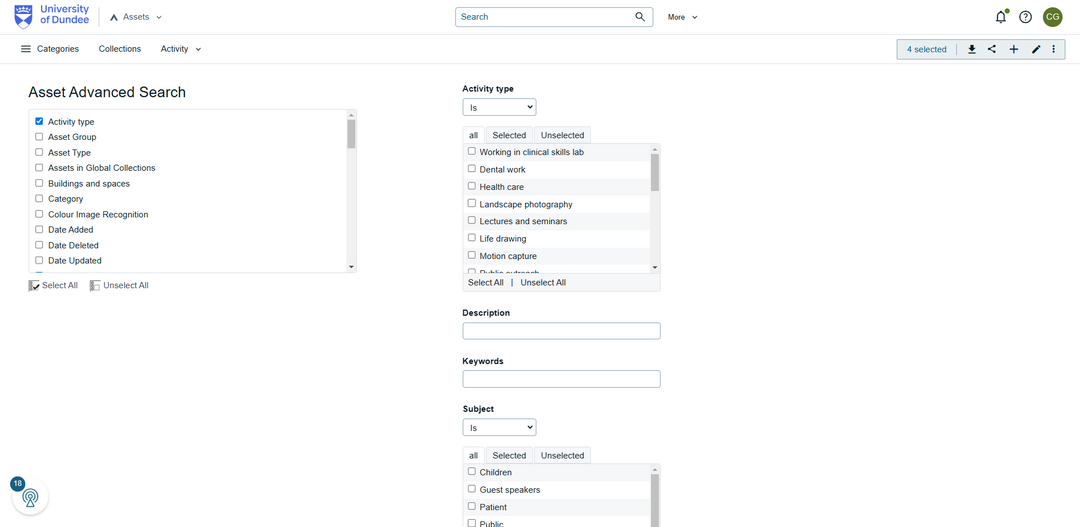
Advanced search
For more search options, use Advanced Search by clicking the More dropdown next to the Search bar. From here, you can:
- select multiple criteria to refine your search.
- save search configurations for future use. You can access saved searches via the More dropdown.
Viewing an asset
To view an asset in more detail:
- Hover over the thumbnail and click View, or
- Click the blue file name link underneath the thumbnail
This opens the Asset View page, where you can explore the asset, enlarge the display, and use the Quick View to zoom in and out.
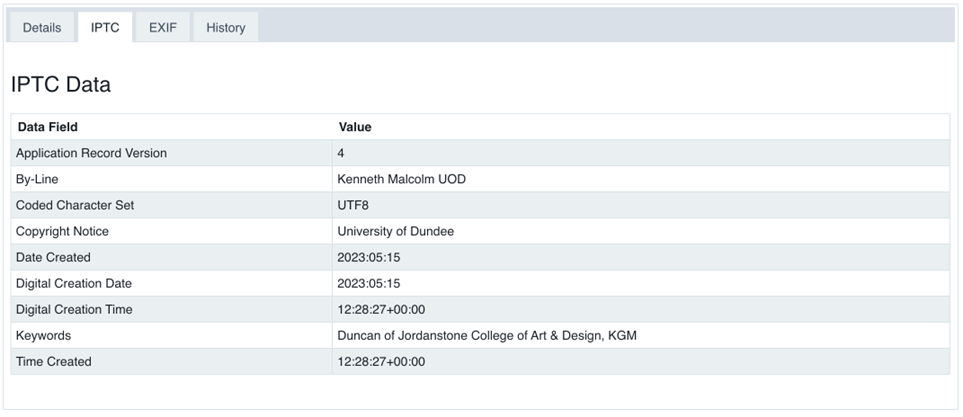
Asset Info
In the Asset View page, you can find key details about an asset by using the Asset Info panel, located to the right of the asset preview.
This panel has tabs where you can:
- view Metadata such as location, subject, and year
- check File info (format, size, resolution)
- access Attachments which are linked to the asset
- see Versions (e.g. different colors of a logo)
Related assets
The system uses metadata and AI image recognition to find and display a list of other assets related to the one you're viewing. This helps you quickly find similar assets or those from the same series, like images from a photoshoot.
Ordering an asset
To order an asset:
- Select assets – in the asset grid, click the checkbox below each asset filename you want to order.
- View selection – click the numbered link in the action tool (top right) to review your selected assets. You can also clear selections here.
- Download – Click the download button next to the selection link.
- Choose format – An asset conversion tool will appear, allowing you to pick a format:
- JPG (small) – for screen use only
- JPG (large) / Original Format – for printing
If you have a limited access role, an Administrator will need to approve your order before download. You can request higher access so that you can download assets without approval, but this is determined on a case-by-case basis.
Sharing assets
Similar to ordering assets, you can use the same process to select multiple assets to share via email from the action tool. You simply need to choose the share icon instead of download.
Restricted assets can only be shared with users who have the same access level. Recipients will only see the assets in your selection that match their permissions.
Collections
Collections help you and your team organise assets within the DAM system.
- Create a collection – select multiple assets from the asset grid, then click Share as Collection in the action tool.
- Name your collection – give your collection a clear name and description for easy identification.
- Share with others – add recipients to notify them of the shared collection.
- View collections – Click Collections (top left) to open the Collections window:
- By default, you'll see global collections, which include collections shared by you or others.
- To view only your collections, click My Collections at the top of the window.
- Click a collection title to open it in a grid view, where you can add or remove assets using the action tool.
Web Services